
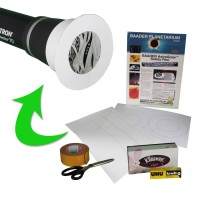
Please also note our detailed instruction manual with images for every step: How to make your own objective solar filter for your camera or telescope –>
The film must be mounted flat and free of any tension – Only this will provide first class Solar images. The quality of this patent pending material is so high that any wrinkles or strain on the film will lead to a very noticeable deterioriation of optical quality.
When mounted carefully, AstroSolarTM Film can reach the quality levels of truly precision polished glass plates (not to compare with several glass filters made of ordinary window glass w/o ever having seen a polishing machine).
The “Cylinder”
 At first you have to produce a cylinder of cardboard, to exactly match the outer circumference of your Telescope tube or dew cap. In order to achieve this, cut a whole number of cardboard layers, approx. 5 -6cm (2 inches) wide. Wrap one piece of cardboard around your dew cap or lens cell and glue one end onto the other.
Fasten a second and third a.s.f. layer of cardboard in the same manner, until you have manufactured a stiff roll of cardboard, approx. 4-5mm thick. Watch out that the finished “cylinder” will slide snuggly over the tube and that it will be easy to slide it on and off the telescope.
Hint: For telescopes with smaller aperture one could try to find an appropriate “poster tube” and cut off a piece of approx. 5 – 6cm length. Variations in diameter could be egalized by using adhesive felt liner or by gluing Kork pads into the paper tube.
The “Filter Cell”
Cut out two rings of cardboard (each having 1-2mm thickness). The outer diameter of the ring – shaped cardboard should match the outer diameter of your fabricated “cylinder”. The inner diameter should correspond to the actual aperture of the instrument (some mm less may improve on image quality, due to hiding sunken edges on imported objective lenses).
 After having prepared two such rings, both should be equipped on adjacent sides with a large number of small cutouts of double tape along the outer circumference of both rings. Now comes the tricky part – how to get the Solar film onto the taped ring w/o wrinkles or ripples. The film must not be scratched – so put one sheet only of Kleenex (or other soft tissue) onto a flat table. Tape the Kleenex onto the table so that this part is streched out evently and cannot move on you. Only now put a square piece of film – (precut to the size of the cardboard-rings) onto the piece of soft tissue. Do not tape the film and do not strech it! Just let it rest relaxed and flat on the Kleenex.
 Now take the first cardboard ring and lower it straight down onto the film until every double tape clipping made contact with the film. Turn this package around, tape the other ring onto the opposite side and cut away the overleaf. Now your AstroSolarTM film should be mounted free from strain and wrinkles between the two cardboard rings. Finally glue this “filter holder” onto the prefabricated “Cylinder”. Now your “Do it Yourself” filter is ready. Enjoy it – you just saved about US$ 100 for the filter cell alone.
 When covering a larger Newtonian or Schmidt-Cassegrain Telescope for Solar Observation, then “Less may be More”! It not necessarily is better to make a filter as large as the telescope aperture itselve. The bigger aperture may be compromized by air turbulence and secondary mirror obstruction. It can be sufficient to produce an “off axis filter cell”, to observe the sun with a smaller telescope, wereby an ordinary reflecting telescope may improve in sharpness and definition to the level of a good refractor.